Great Dane Leash Training
When it comes to Great Dane leash training, starting early makes the process much easier. However, if you’re getting a late start, don’t panic. With the right approach and consistent practice, dogs of almost any age can learn calm, reliable leash habits. In this guide, I’ll walk you through both early-stage puppy training and late-stage leash correction so you can build confident, stress-free walks with your gentle giant.
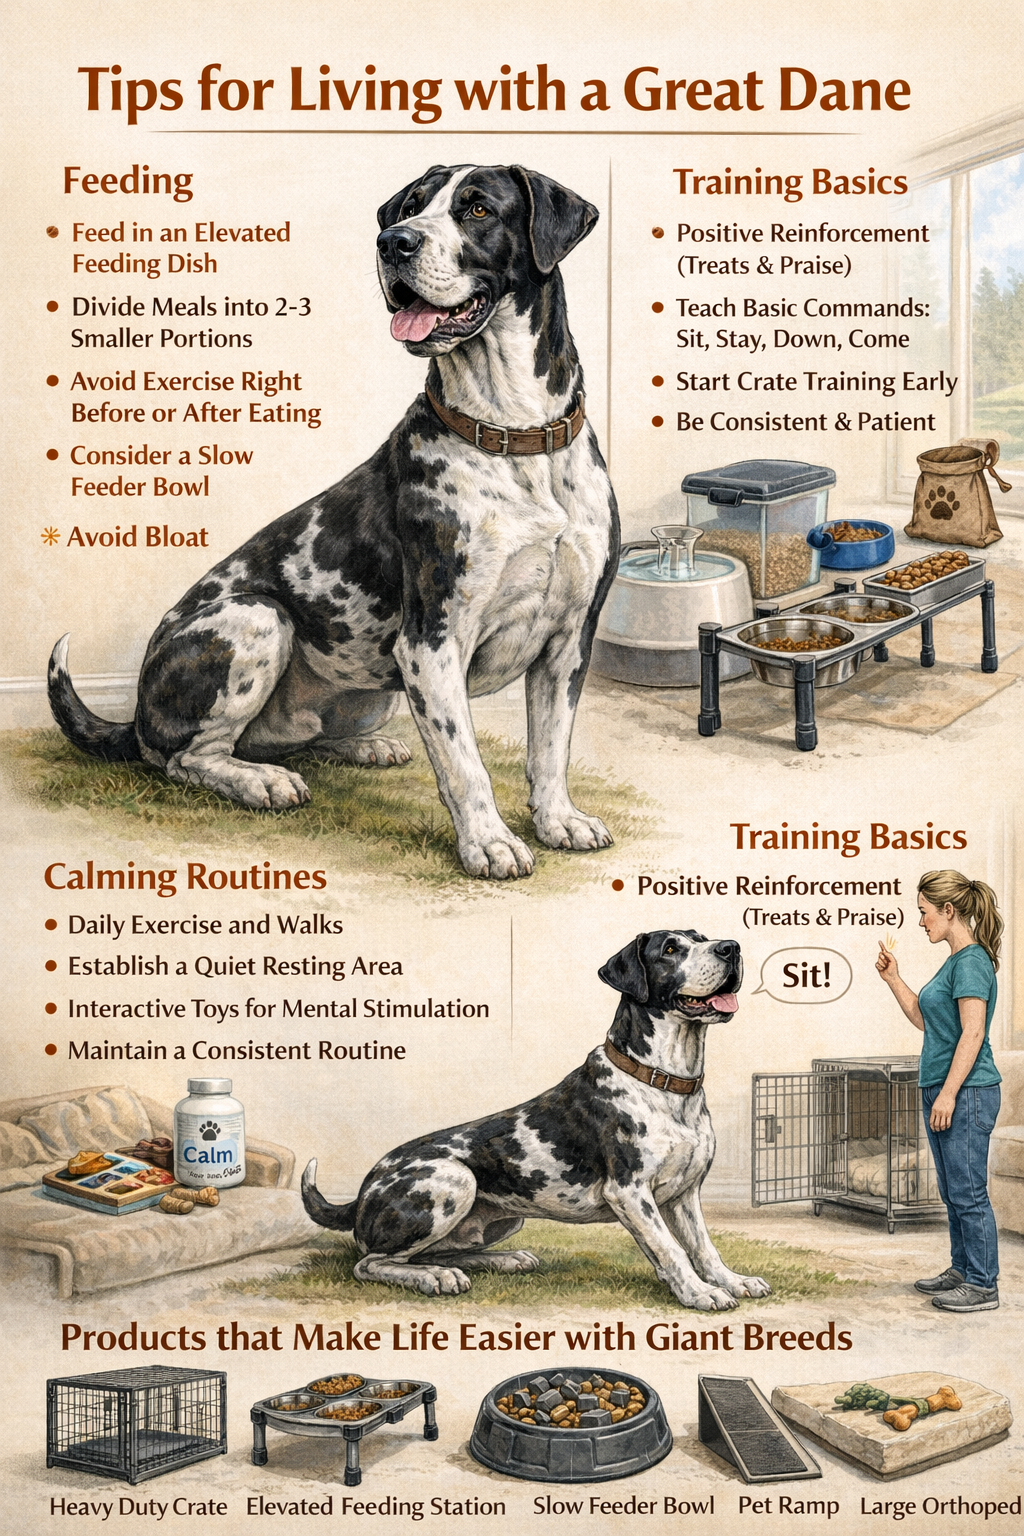
Training Tips & Daily Routines
Feeding, training basics, calming routines, and products that make life easier with giant breeds.
Go to Care →
Great Dane Safe Home
Traction zones, stairs safety, and house setup changes that prevent slips and injuries.
Safer House →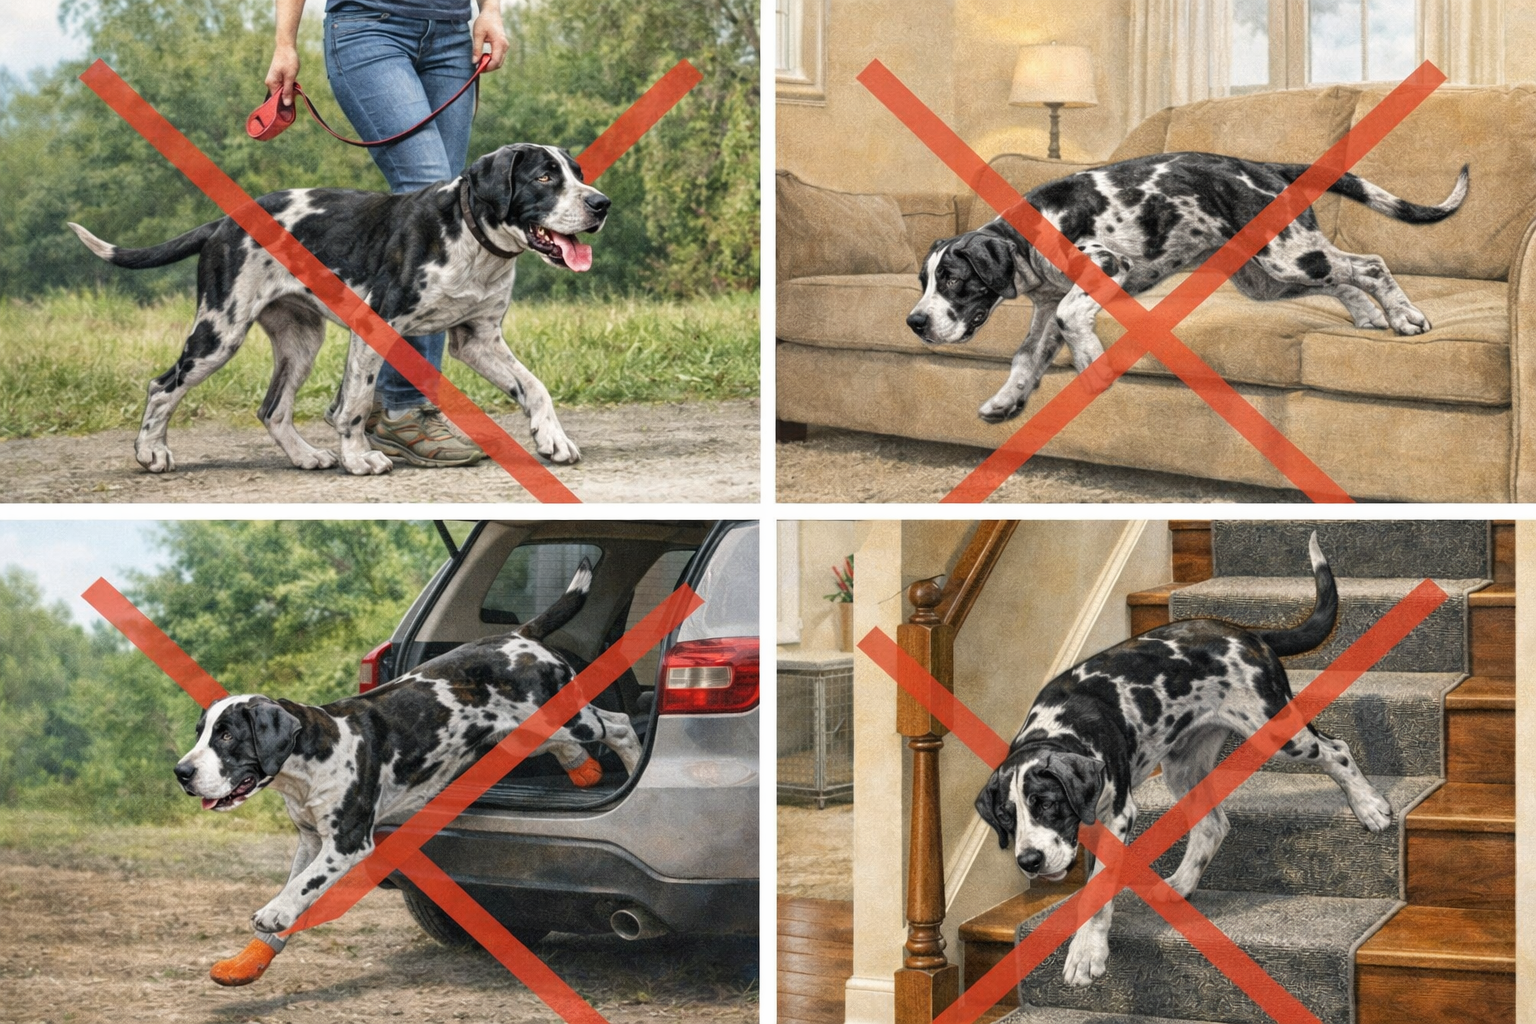
Exercise Guide (Puppy-Safe)
How much movement your Great Dane really needs—without stressing joints during growth.
Exercise Guide →Leash Training
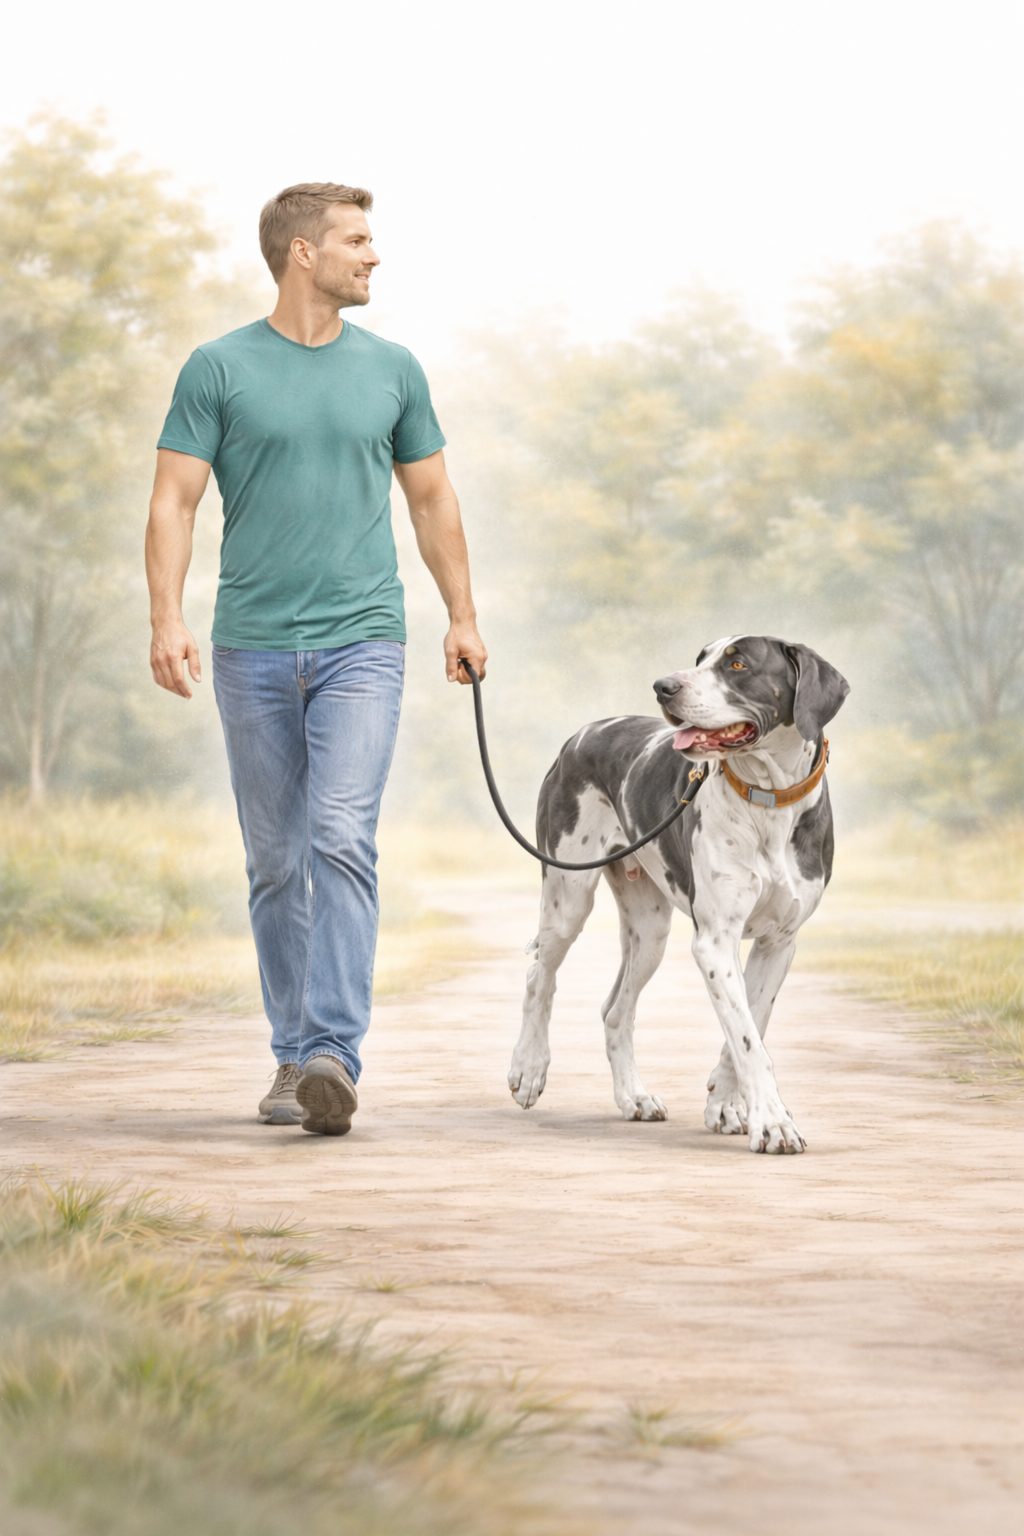
Great Dane Leash Training: Calm Walks Start Here
Teaching your Great Dane to walk politely on a leash is one of the most important skills you can build together. This guide walks you step by step through proven leash training methods designed specifically for large, powerful dogs. Whether you are starting with a puppy or working with an adult puller, the goal is the same: calm, controlled, and enjoyable walks.
On this page, you’ll learn how to introduce the leash properly, prevent pulling habits, choose the right training gear, and build reliable loose-leash walking behavior through short, consistent sessions. With patience and the right approach, even strong Great Danes can become relaxed, well-mannered walking partners.
Jump to setup →Leash Training
Great Dane Leash Training Philosophy
This page focuses on Great Dane leash training, practical loose-leash walking techniques, and the real-world methods that have worked for me over the years. In addition, I briefly explain why I generally do not prefer using a harness during early leash training, and I reference well-known trainer Zak George as another helpful resource for positive dog training guidance.
If you spend any time on YouTube researching dog leash training, you will quickly notice there are many strong opinions. Some trainers insist their method is the only correct approach, while others claim certain tools or techniques are completely wrong. However, the reality is much simpler: there is rarely only one right way to train a dog.
First and foremost, I want to be clear that I am not a professional dog trainer. I have not spent thousands of hours in formal training programs. Instead, the leash training techniques shared on this page come from personal experience, lessons learned from respected trainers, and many hours working hands-on with my own Great Danes and puppies I have bred or helped start in training.
Because of this, think of these methods as practical tools that have worked well in my real-world experience. They may work perfectly for you and your dog, or you may need to adjust them to better fit your situation. Furthermore, if you choose to work with a professional dog trainer, I strongly recommend following their guidance, since they can evaluate your specific dog in person.
Most importantly, remember that successful loose-leash training is built on patience, consistency, and clear communication. Yelling, hitting, or physically striking a dog does not create reliable leash manners. Instead, a calm tone, steady leadership, and positive reinforcement form the foundation of effective dog training and a strong bond between you and your dog.
Jump to setup →Step One: Gear Up
Leash Training Equipment
- A good leash with a metal latch, we want it to be sturdy.
- We need a collar with a solid metal buckle, I prefer not to use the quick connecting type when training.
- Have to have a treat pouch, or training pouch. When we reward we need it in the moment and that’s what a pouch provides.
- Treats, rewards, we need something to reward with.
- A calm soothing, reassuring voice for commands and direction.
- Consistency, lots and lots of consistency.
Using the Right Tools for Successful Leash Training
Having the right tools for success is absolutely essential, especially when it comes to leash training. Before you ever step out the door, proper equipment helps set both you and your dog up for safer, more effective training sessions.
As you are beginning to see, leash training is one of the most important forms of dog training your pup will ever receive. A well-trained dog on leash is easier to manage, safer in public, and far more enjoyable to walk. In contrast, poor leash habits can quickly turn even a short walk into a frustrating experience.
Working confidently with a leash becomes vital anytime we take our dog into public spaces, busy neighborhoods, parks, or vet visits. Because of this, understanding the different uses and purposes of a leash is incredibly valuable for every dog owner, especially those handling large breeds like Great Danes.
Most importantly, we must make sure we are using the correct leash and collar for training. The right combination improves communication, supports loose-leash walking, and helps reinforce the calm leadership your dog needs to follow successfully.
Joytale Dog Leash, 6 FT Double-Sided Reflective, Padded Handle Nylon Heavy Duty Leashes for Medium & Large Dogs Walking, Black
A six-foot lead is one of the most useful tools in everyday Great Dane puppy care, especially for indoor management, recall practice, and calm redirection. Because it keeps your puppy within reach, you can guide behavior the moment unwanted habits begin instead of reacting too late.
Redirection Using A Six-Foot Lead
When your puppy is inside, I strongly recommend keeping a lightweight six-foot lead attached during supervised time. As a
result, you can gently redirect at any moment without chasing, grabbing, or creating stress. The key here is gentle redirection.
Never jerk, pull, or drag your puppy. Instead, use the lead as a quiet guide to help them make better choices.
Just as importantly, redirection only works when you provide a clear alternative. For example, if your puppy heads into
a restricted room, calmly guide them back to the correct area. Likewise, if they grab a shoe or power cord, redirect them
immediately to an appropriate chew toy. Over time, this consistent pattern teaches your puppy what to do, not just what to avoid.
Always follow successful redirection with calm praise and affection. This reinforces the correct behavior and builds confidence
in the learning process.
Cautionary Advice
I’ve seen firsthand how quickly puppies can make dangerous decisions. Years ago, my boss’s young dog slipped out the door, ran straight into the road, and was tragically hit by a car. It was devastating. In many situations like this, a simple lead during early training stages can provide the extra second of control that prevents a heartbreaking accident. Find on Amazon →
Affiliate link: I may earn a small commission at no extra cost to you. If this guide helped you, using my links helps support MyGreatDane.org.
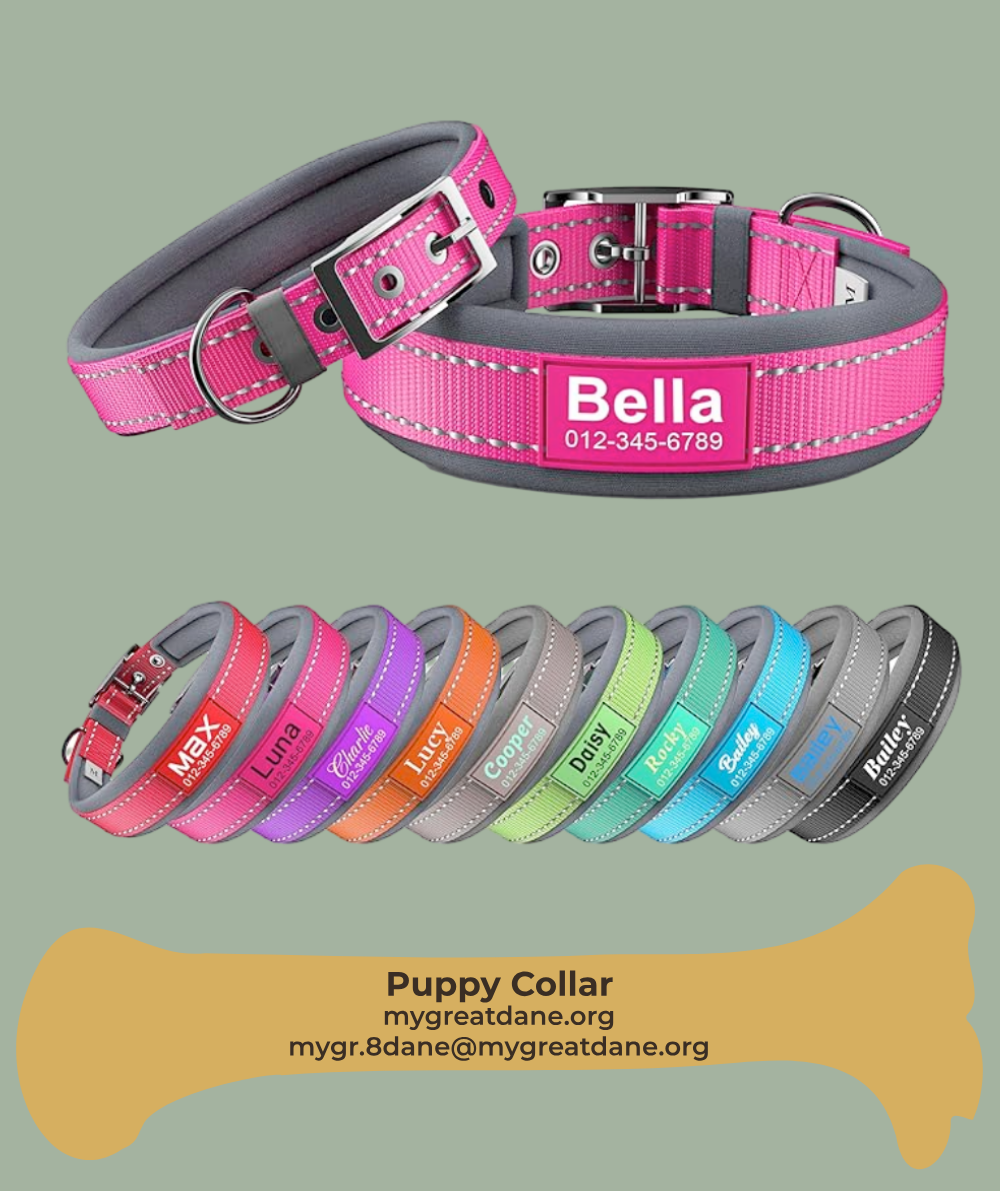
Personalized Dog Collar with Name & Phone Number | Reflective Ultra Wide Soft Neoprene Padded | Durable Metal Buckle for Large, Medium, and Small Dogs in Pink, Purple, Blue & Other Stylish Colors
Please Read and Consider: Your puppy is going to need a properly fitted collar. There’s really no way around it. However, one detail I strongly recommend paying close attention to is the type of buckle you choose.
Metal Buckle
For Great Dane puppy care, I strongly prefer a metal buckle collar over plastic quick-clip styles. While plastic
snap buckles are convenient, they can fail under sudden pressure or a sharp jolt, especially with fast-growing, strong puppies.
I have personally seen plastic quick-connect buckles fail even on young Great Dane puppies during early leash training inside the
house. Because of that experience, I recommend sticking with a sturdy metal buckle during the learning phase when unexpected lunges
and excitement are most common.
Never Jerk or Pull
That said, even metal hardware should always be used correctly and checked regularly for wear. In rare cases, I have seen
metal components fail on adult Great Danes, but this was typically due to improper use or damaged equipment rather than
normal handling.
As your puppy matures and develops reliable recall and leash manners, you can decide whether to transition to other collar
styles. However, during early training and management, a well-fitted collar with a quality metal buckle provides an extra
layer of security and peace of mind.
Affiliate link: I may earn a small commission at no extra cost to you. If this guide helped you, using my links helps support MyGreatDane.org.
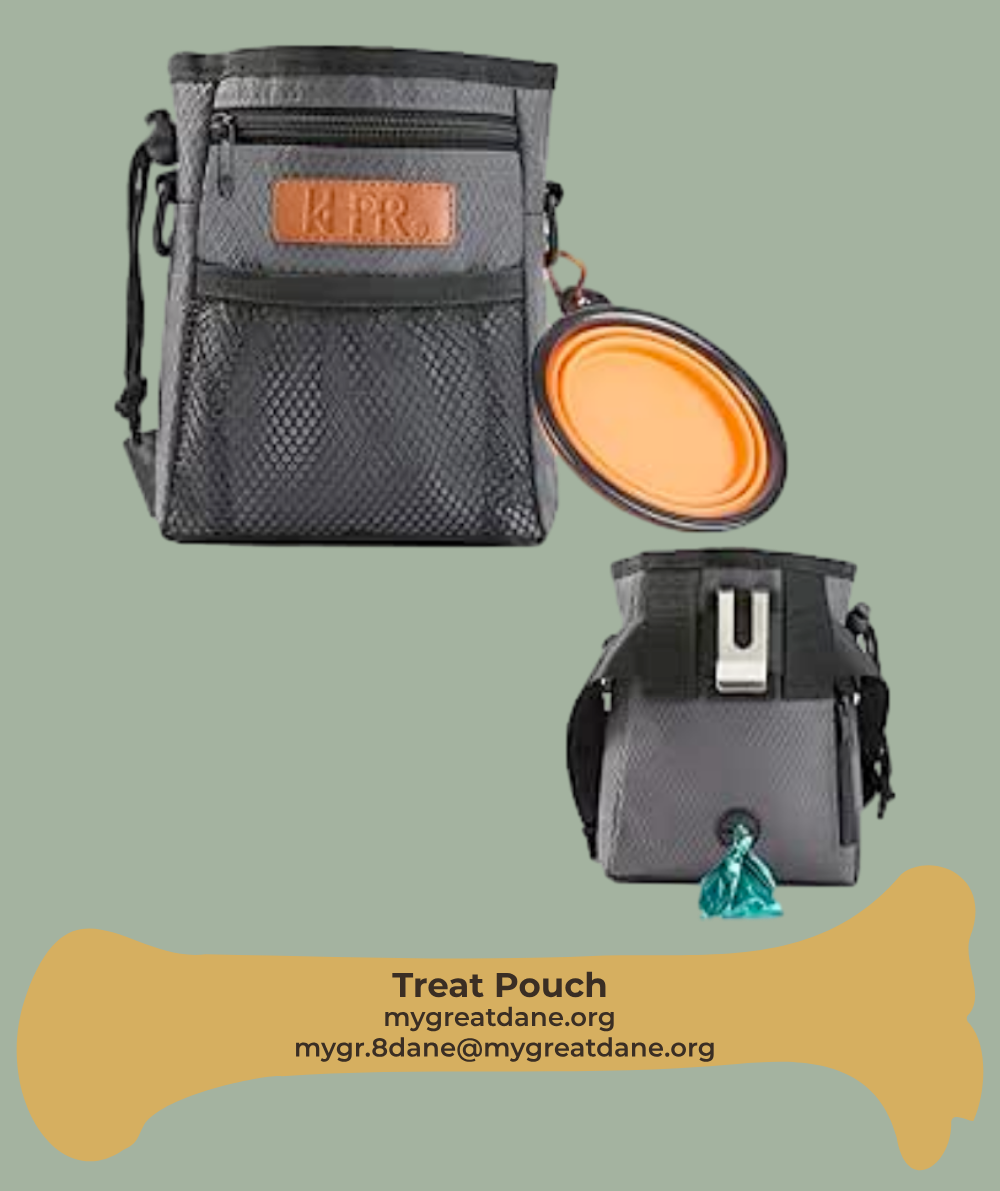
Dog Training Pouch with Treat Storage and Collapsible Bowl
When walking your dog or doing any type of outdoor obedience work, a reliable dog training pouch quickly becomes one of those tools you wonder how you lived without. This compact treat pouch is designed to keep your rewards, accessories, and cleanup supplies organized and within easy reach during every training session.
One feature I especially like on this model — and something my older pouch does not have — is the included collapsible silicone drink bowl. This is extremely helpful in hot climates, on longer walks, or when hiking with your dog. Quick access to water can make a big difference, especially for large breeds like Great Danes.
The pouch also includes a built-in dog waste bag dispenser, which allows you to pull bags quickly without fumbling through pockets. Typically, I load four or five beef sticks (usually Pup-Peroni), break them into small pieces, and fill the pouch before heading out. As a result, rewarding your dog during leash training becomes fast and seamless without stopping to dig through a backpack or jacket.
In addition, the spacious interior provides easy storage for dog treats, small toys, and other training essentials. The bright, easy-to-clean lining helps you quickly spot what you need, even during active training sessions at the park. Meanwhile, the two sturdy D-rings allow you to clip on a training clicker or attach used waste bags for convenience.
Overall, if you are serious about puppy training, Great Dane leash training, or structured daily walks, this all-in-one dog training bag is a highly useful piece of gear to keep within arm’s reach.
Find On Amazon →Affiliate link: I may earn a small commission at no extra cost to you. If this guide helped you, using my links helps support MyGreatDane.org.
Introduce The Leash
If you have not already done so, the next step in successful leash training is properly introducing the leash to your dog. Before clipping it on, allow your puppy or adult dog to see and sniff the leash so it becomes a normal, non-threatening object in their environment.
Introduce The Leash
Before beginning structured leash training, take a few minutes to properly introduce the leash in a calm, controlled environment. This step helps your puppy or adult dog build confidence and prevents overreaction once leash pressure is applied.
- Let your dog see and sniff the leash first. This prevents the leash from feeling like a surprise when clipped on.
- Once your dog is comfortable, attach the leash to the collar. Keep your movements slow and relaxed.
- Start inside your home or in a secure backyard. Beginning in a familiar space keeps early sessions calm and controlled.
- Gently walk your dog around the house or yard. Use light guidance while they adjust to the new sensation.
- Maintain a calm, reassuring tone. Your voice helps your dog stay relaxed and focused during early leash work.
By practicing in a safe, low-distraction environment, you give your dog time to build confidence while learning the basics of loose-leash walking. This early foundation makes outdoor training sessions much smoother.
Don’t Do This
During early leash training, certain common mistakes can quickly create confusion, pulling habits, or anxiety. Avoid these behaviors to keep your dog progressing smoothly.
- Clip the leash on and immediately head into the street. Give your dog time to adjust indoors first.
- Jerk or pull against your dog. Tug-of-war behavior teaches resistance, not cooperation.
- Do not allow your dog to consistently lead the walk. Early structure builds better long-term leash manners.
- Do not yell or become frustrated during training. Dogs respond to calm tone and consistency, not volume.
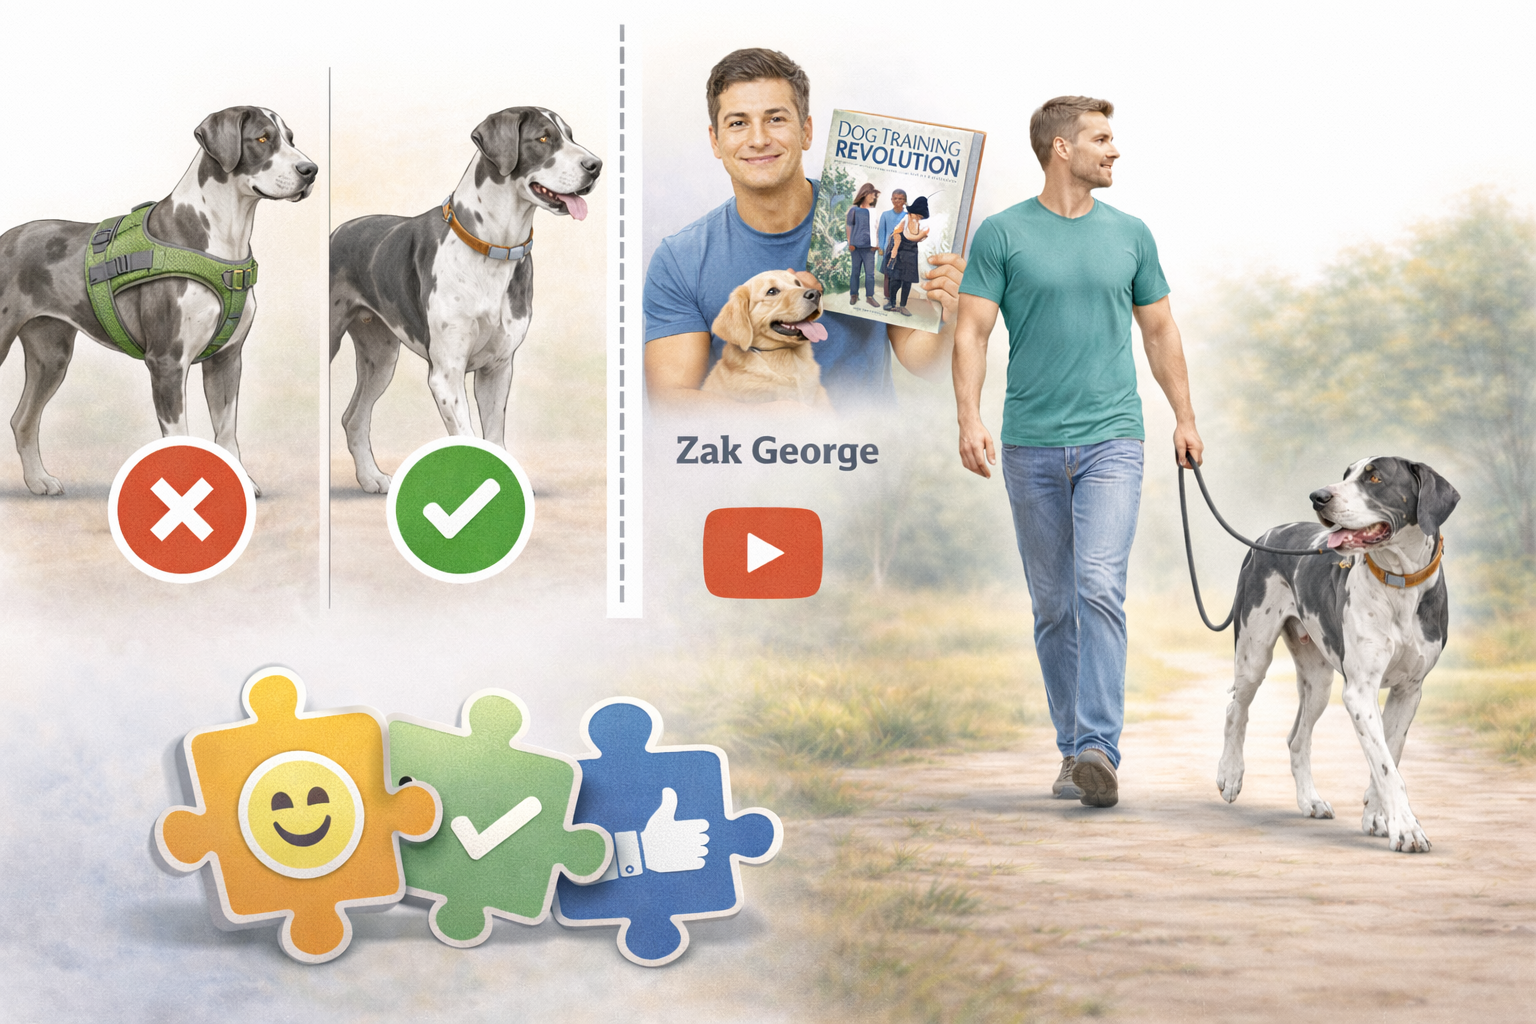
- Avoid using a harness during training. Choose a good collar that support gentle redirection and clear communication.
Most importantly, remember that proper dog leash training requires patience and repetition. Stay calm, stay consistent, and guide your dog with clear, confident direction. When handled correctly, even powerful breeds like Great Danes develop excellent leash manners.
Using a harness encourages pulling. By using a collar you can redirect easily by changing directions.
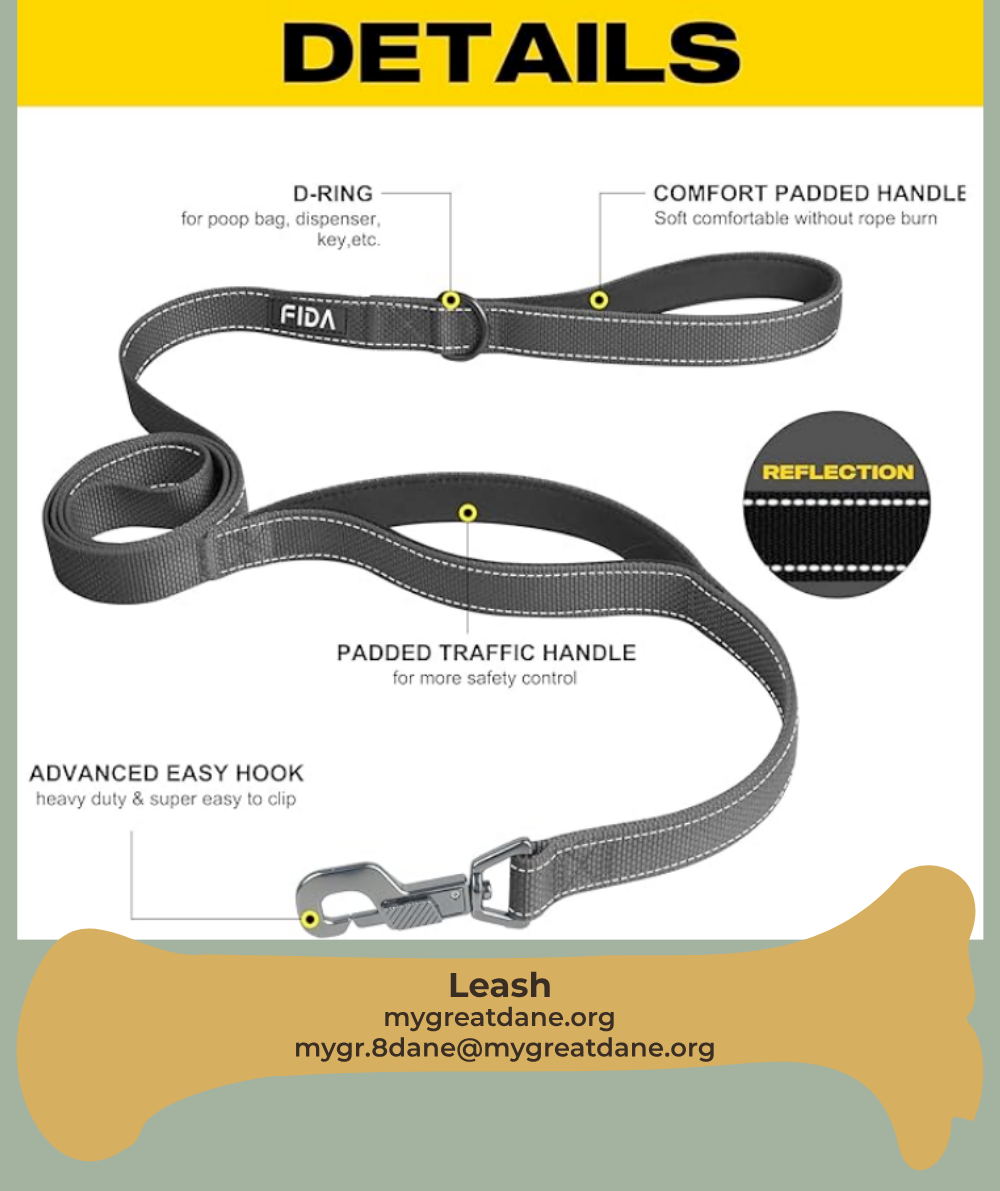
Dual-Handle Training Leash Option
Here is another excellent option when selecting the right dog training leash. One feature I really like on this model is the built-in secondary traffic handle located closer to your dog’s collar. This gives you quick, close-range control when needed, which can be especially helpful during Great Dane leash training or in crowded environments.
I do want to point out an important detail about the clasp. While this leash uses the correct style buckle, it includes a quick-connect spring mechanism. Because of that, you should always double-check that the clasp is fully locked before heading out. Occasionally, owners think the leash is secure when it has not fully engaged, so a quick safety check becomes part of good leash-handling habits.
The advanced easy-hook metal clasp is designed for fast attachment to your dog’s D-ring. Simply slide the clasp over the ring and it automatically locks into place. In addition, the heavy-duty 360-degree swivel helps prevent twisting and tangling during walks, training sessions, jogging, or hikes.
In terms of durability, this leash is constructed from high-strength nylon with reinforced stitching, making it noticeably thicker and stronger than many standard leashes. The one-inch width and tight sewing provide dependable strength for large and powerful breeds while still remaining comfortable in hand.
Another standout feature is the dual soft neoprene-padded handles. The main handle offers everyday comfort, while the lower traffic handle gives you faster, more secure control in high-distraction situations. This design helps reduce rope burn and improves handling during active loose-leash training.
For added safety, reflective threading is woven into the leash to improve visibility during early morning or evening walks. Overall, this is a well-rounded leash option for dog owners who want durability, comfort, and improved control during daily walks and structured training sessions.
Find on Amazon →Affiliate link: I may earn a small commission at no extra cost to you. If this guide helped you, using my links helps support MyGreatDane.org.
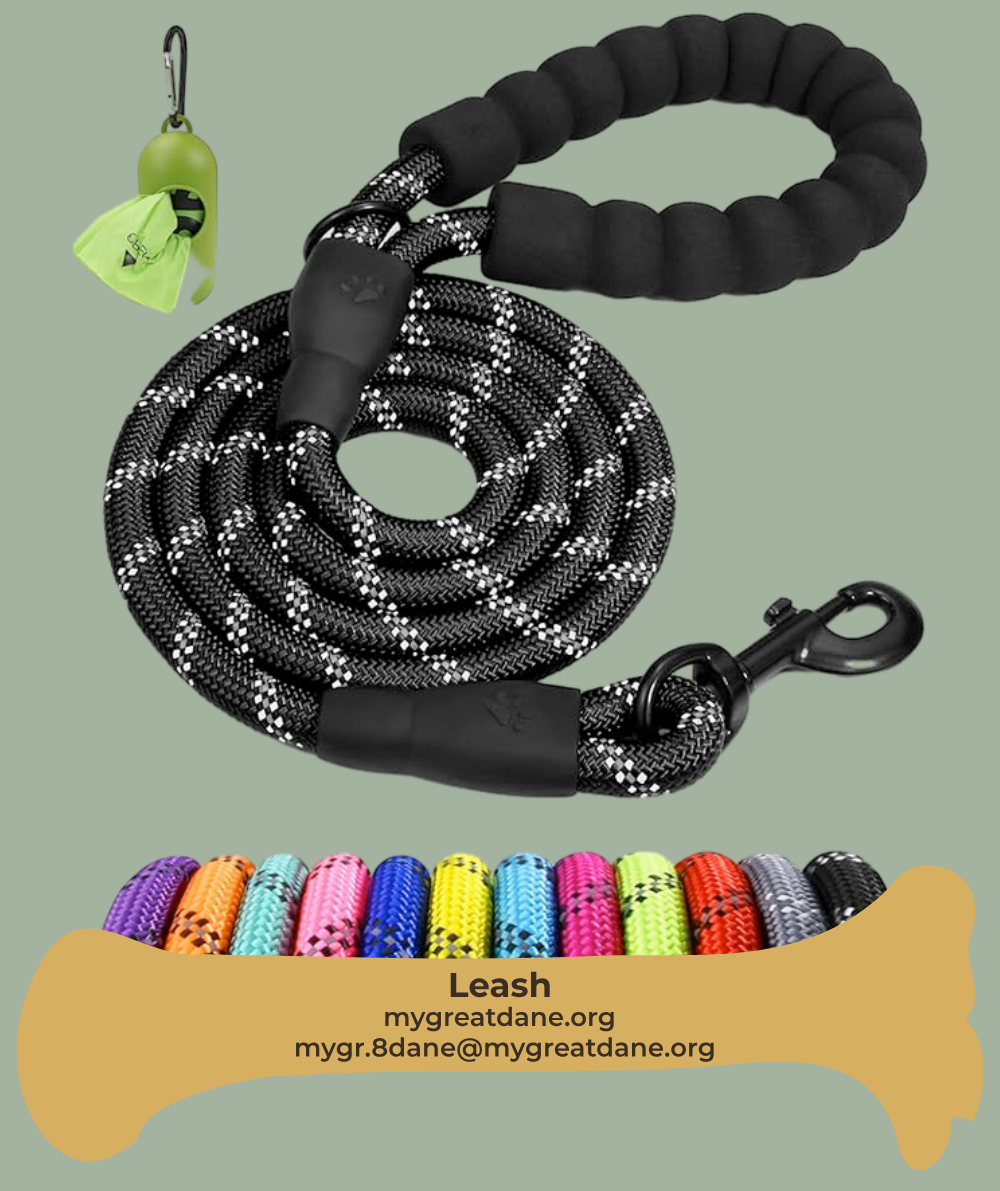
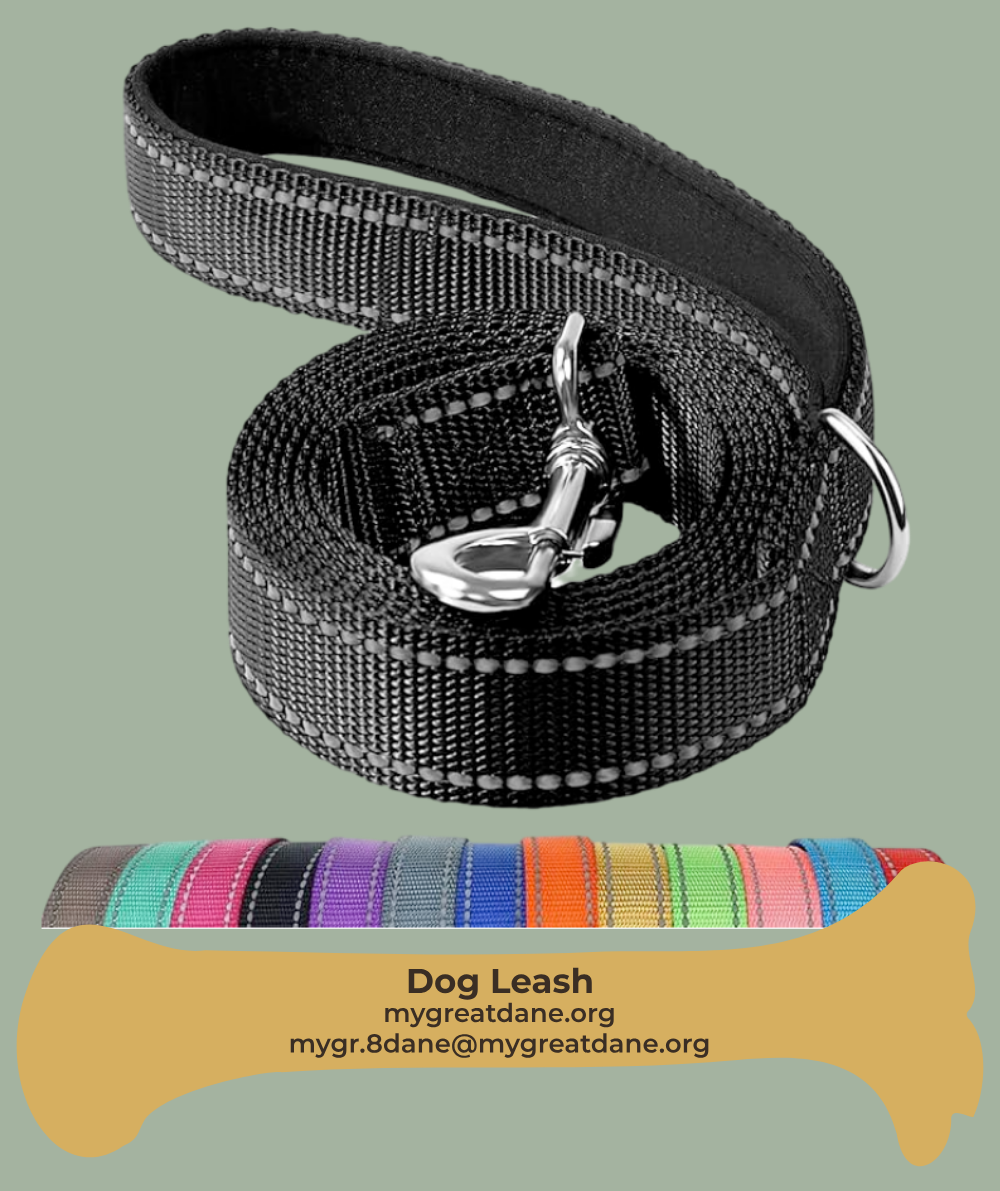
Heavy-Duty Rope Leash Option
Here is another solid option when choosing a dog training leash: the classic rope leash. These leashes are extremely durable and reliable. However, if you do not have a large or powerful dog, this style may be more leash than you actually need.
This particular model is constructed from 1/2-inch rock climbing rope, making it a true heavy-duty leash built for strength. Because of its thick diameter and rugged design, it is especially well-suited for strong pullers and large breeds such as Great Danes. Simply put, if your dog can generate serious forward momentum, this leash is built to handle it.
That said, if your dog answers to names like “Muffy” or “Lovkins,” this may be a bit of overkill. Smaller or more relaxed dogs typically do not require this level of leash strength, and a lighter option may feel more comfortable for everyday walks.
For handler comfort, the leash includes a soft padded foam handle designed to reduce hand fatigue and prevent rope burn. This becomes especially important during loose-leash training sessions or when working with dogs that are still learning proper walking manners.
Safety is also addressed with highly reflective threads woven throughout the entire rope. This improves visibility during early morning walks or evening outings, helping both you and your dog remain more visible to passing vehicles and cyclists.
Additionally, the heavy-duty zinc alloy clasp features a smooth 360-degree swivel. This helps prevent twisting and tangling while allowing your dog to move naturally during walks, hikes, or training sessions. The rust-resistant hook clips quickly and securely onto most collars and harnesses.
Overall, this rope leash offers an excellent balance of durability and control for owners of strong, energetic dogs. It is available in multiple lengths and colors, with the 1/2-inch diameter best suited for medium to large breeds, while the lighter 3/8-inch version works better for smaller dogs.
Find On Amazon →Affiliate link: I may earn a small commission at no extra cost to you. If this guide helped you, using my links helps support MyGreatDane.org.
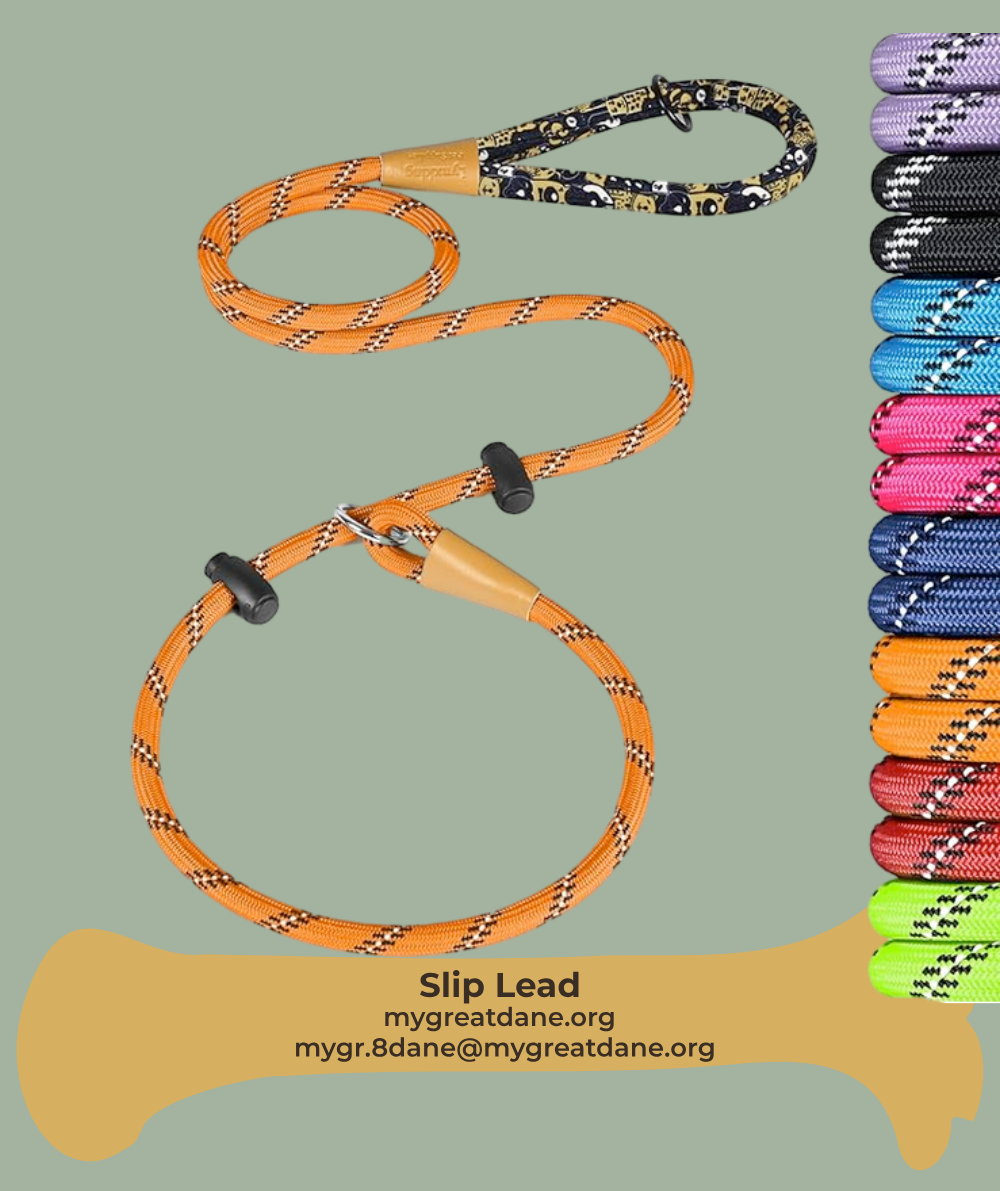
Slip Lead Overview: Use With Care
I went back and forth on whether to include this tool, because in the right hands it can be very effective — and in the wrong hands it can cause real problems. This is known as a slip lead, and it is specifically designed for controlled handling and certain types of dog leash training.
Unlike a standard leash, a slip lead does not require a separate collar. The loop simply slides over your dog’s head and gently tightens when pressure is applied. Because of this design, it provides very clear directional communication, but it must always be used correctly and calmly.
The model shown here includes two adjustable stops, which is a feature I strongly prefer. One stop helps prevent the lead from tightening too much around your dog’s neck, while the second stop keeps the loop from becoming too loose. If someone were going to use a slip lead, this style offers an added layer of safety and consistency.
One advantage of a properly used slip lead is control. Your dog can clearly feel subtle guidance when you change direction, and the design naturally discourages head dipping and forward lunging. This is one reason veterinarians and professional handlers often use slip leads when moving dogs into exam rooms, kennels, or surgical areas.
However, this tool requires restraint and good technique. There should be no jerking, snapping, or tug-of-war behavior. It is called a “lead” for a reason — the goal is to guide your dog, not force them. Used improperly, excessive pressure can create fear, resistance, or injury.
In situations involving highly reactive or very strong dogs in public settings, a slip lead can provide additional control when handled correctly. That said, if you choose to use one, take the time to research proper placement and handling. Watching reputable training demonstrations and learning correct technique will help ensure your loose-leash training remains safe and effective.
Find On Amazon →Affiliate link: I may earn a small commission at no extra cost to you. If this guide helped you, using my links helps support MyGreatDane.org.
Harnesses
- Your dog is aggressive and you need a little more assurance.
- Great for hiking
- Good for secondary control
- Excellent tool if your pup is already leash trained
- Stylish, there are lots of different designs
Some people love harnesses and swear by them, and if they work for you fantastic. This is just from my personal experience.
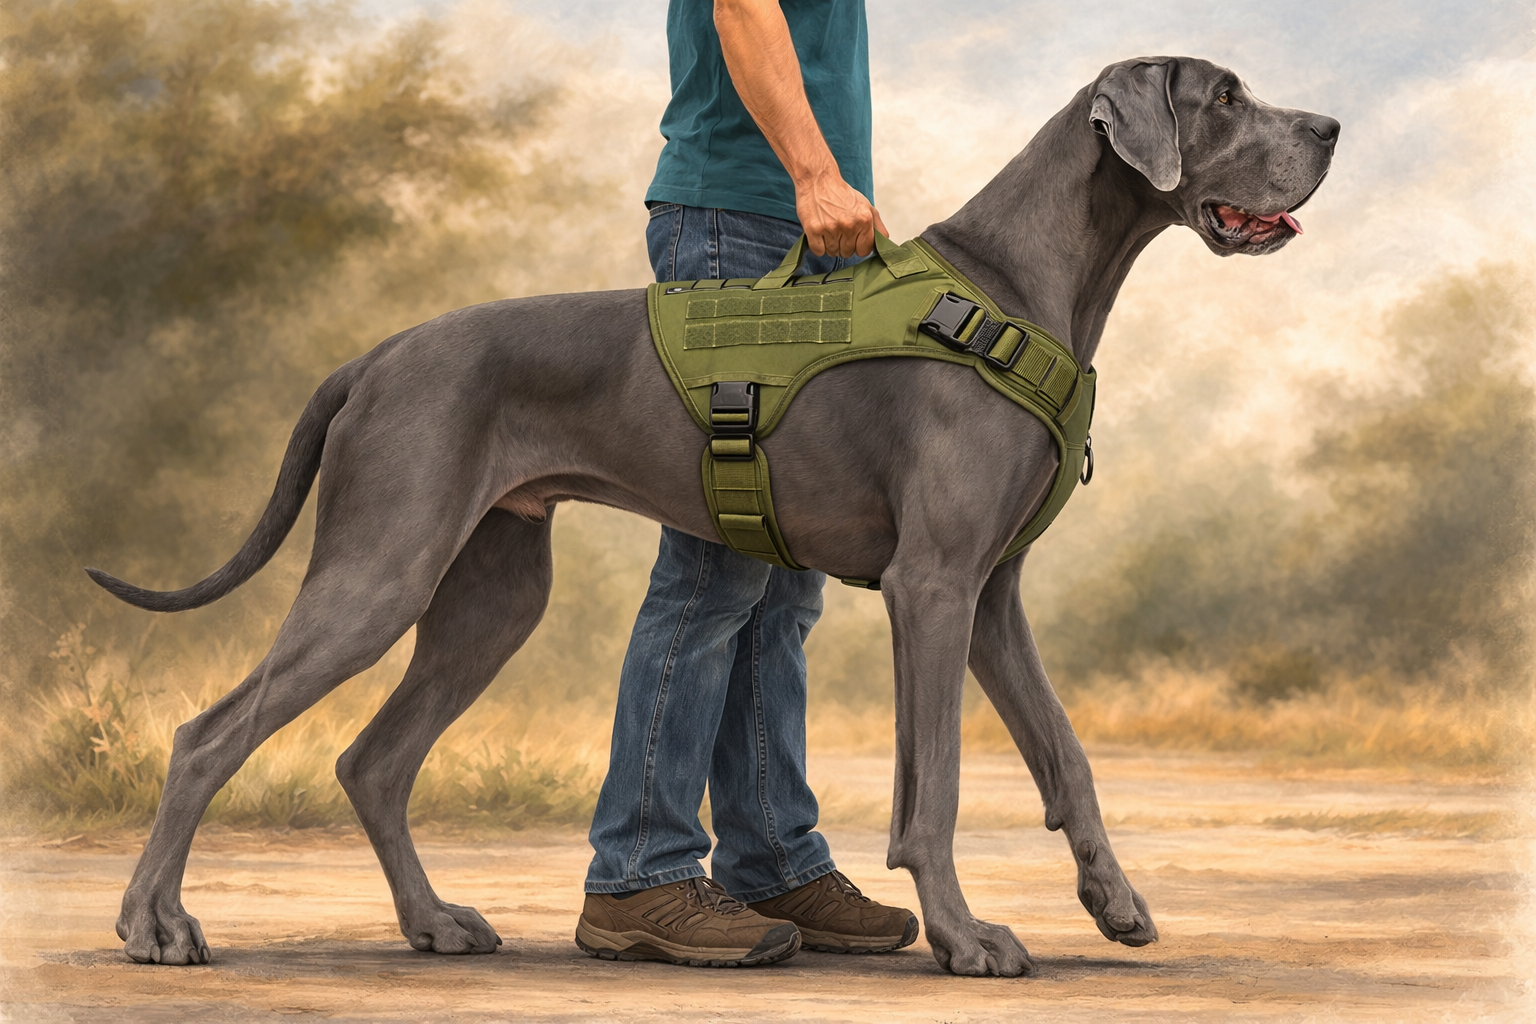
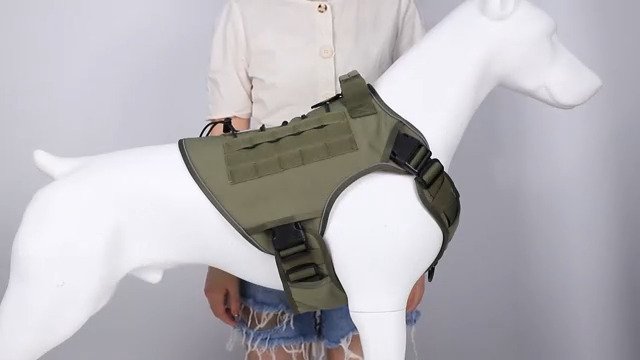
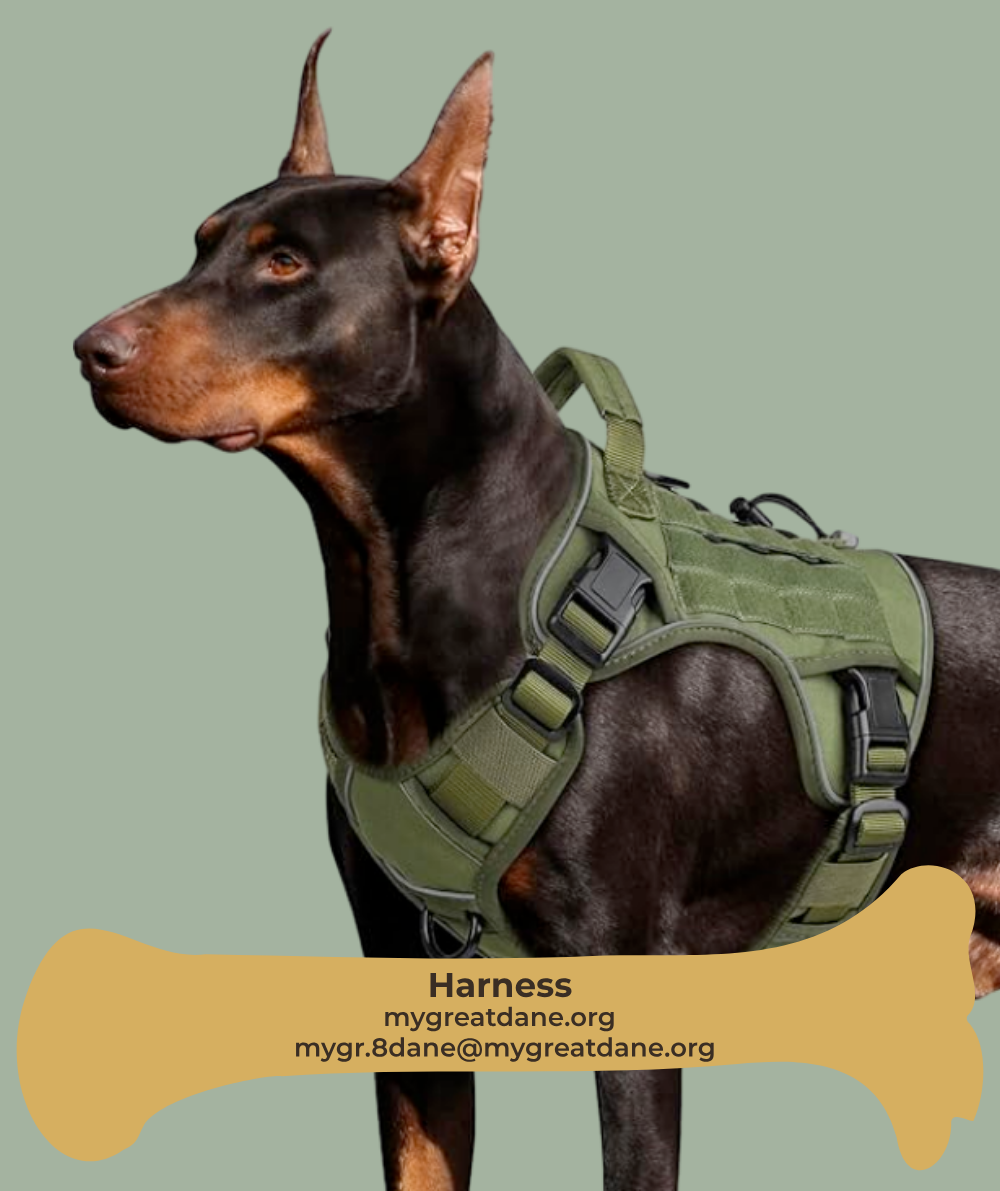
Harness Overview: When to Use One (and When Not To)
To be clear, I am not against using harnesses. They can be very useful tools in the right situations. However, for early leash training, I generally do not recommend relying on a harness. Many dogs naturally lean into harness pressure, which can encourage pulling instead of promoting proper loose-leash walking.
That said, harnesses absolutely have their place once your dog understands basic leash manners. For example, as shown in the image, this model includes a sturdy top handle. This feature can be extremely helpful if your dog becomes overstimulated, reactive, or needs quick physical control in crowded environments.
Even when you are primarily walking your dog on a collar, a harness with a handle can serve as a valuable backup tool. It allows you to quickly guide your dog away from potential conflicts, such as tense moments at the park or unexpected encounters with other dogs.
Another practical feature is the built-in Velcro panel. Many owners like to attach identification patches, service labels, or even fun accessories. For example, Max proudly sports an American flag patch along with a few personality-filled add-ons. For hikers, the harness can also support small attachments such as a collapsible water bowl or lightweight gear.
Overall, harnesses work best for dogs who are already reasonably well leash trained, as well as for outings like dog parks, busy events, or hiking trips where additional control may be helpful. Used appropriately, a quality harness can be a useful part of your dog training toolkit — just not your primary teaching tool during the early stages of leash training.
Find On Amazon →Affiliate link: I may earn a small commission at no extra cost to you. If this guide helped you, using my links helps support MyGreatDane.org.
Step Three: Consistent Training Schedule
Step 3: Set a Consistent Training Schedule
One of the biggest keys to successful leash training is simple consistency. Dogs — especially large breeds like Great Danes — learn best through short, repeated sessions rather than occasional long workouts. The goal is to build a predictable routine your dog can quickly understand and trust.
- Keep sessions around 20 minutes. This is plenty of time for productive loose-leash training without mentally overwhelming your dog.
- Train daily if possible. Frequent, shorter sessions produce faster and more reliable leash manners than sporadic training.
- Attach training to an existing routine. For example, work your dog as soon as you get home from work or before the evening walk. Habit stacking makes consistency much easier.
- Commit to a 30-day training streak. Thirty consecutive days builds momentum, reinforces expectations, and helps your dog clearly understand the new walking rules.
- End sessions on a calm success. Even small wins — a few good steps at your pace — are worth rewarding and help keep your dog motivated.
Stick with 20 minutes a day for 30 days, and you will see real progress. In many cases, within just a few weeks your Great Dane will begin walking farther and more calmly at your side.

Pup-Peroni Original Beef Recipe Training Treats
When it comes to effective dog training treats, these are easily one of my personal favorites. Pup-Peroni Original Beef Recipe treats have a strong, meaty scent that immediately grabs a dog’s attention, which makes them especially useful during leash training and obedience work.
One of the biggest advantages is their soft texture. Because the treats are slow-cooked and tender, they are easy to break into very small reward pieces. This allows you to reinforce good behavior frequently without overfeeding your dog during longer training sessions.
In my experience, the scent alone is a powerful motivator. If I’m holding even one small piece, Harley is completely locked in and ready to work. That kind of focus is exactly what you want when teaching loose-leash walking or reinforcing the “right here” position.
Typically, I will break three to four sticks into tiny bites before heading out. Then I load them into my training pouch (my “treat purse”) so rewards are always within easy reach. Pairing these treats with a good training pouch makes outdoor sessions smoother, faster, and far more productive.
Additional benefits include real beef as the number one ingredient, production in USA facilities, and a formula made without Red 40 or unnecessary fillers. Overall, these treats strike a great balance between palatability, convenience, and training effectiveness for dogs of all sizes.
Find On Amazon →Affiliate link: I may earn a small commission at no extra cost to you. If this guide helped you, using my links helps support MyGreatDane.org.
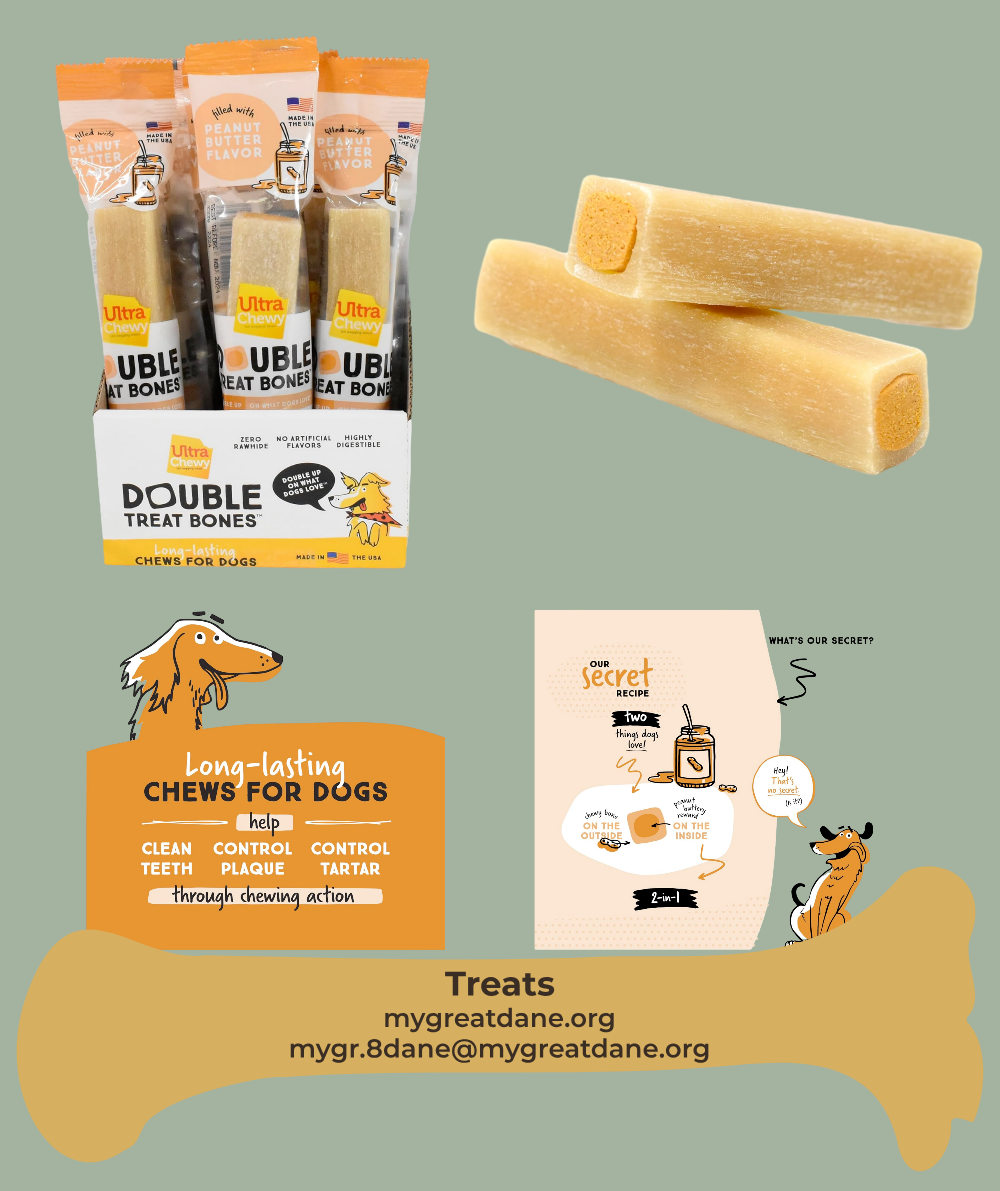
Ultra Chewy Peanut Butter Treat Bones
My dogs absolutely love these — and to be clear, these are not training treats. I actually keep these at my desk and give them out as occasional rewards when the crew wanders in to supervise my work (which they take very seriously).
While working on this page I happened to be restocking them on Amazon, so I figured I would slide them in here for anyone looking for a longer-lasting chew option. Personally, I always grab the peanut butter variety. For whatever reason, my dogs go completely nuts for that flavor.
These treats are designed as a long-lasting 2-in-1 chew, featuring a durable outer layer with a flavorful chewy center. Because they occupy your dog for longer periods, they work well as a calm downtime reward rather than a rapid-fire dog training treat.
Another advantage is the highly digestible, rawhide-free formula. You get the long-lasting chewing satisfaction similar to traditional rawhide, but without many of the common stomach concerns that come with it.
Chewing is also a natural behavior that supports canine dental health. As your dog works through the chew, it can help reduce plaque and tartar buildup, which may contribute to fresher breath and a healthier mouth over time.
These treats are proudly made in USA facilities and are easy to keep on hand at your desk, in a treat cabinet, or for occasional rewards throughout the day. Just remember: save your soft, high-scent treats for leash training, and use these as the enjoyable bonus chew they are meant to be.
Find On Amazon →Affiliate link: I may earn a small commission at no extra cost to you. If this guide helped you, using my links helps support MyGreatDane.org.
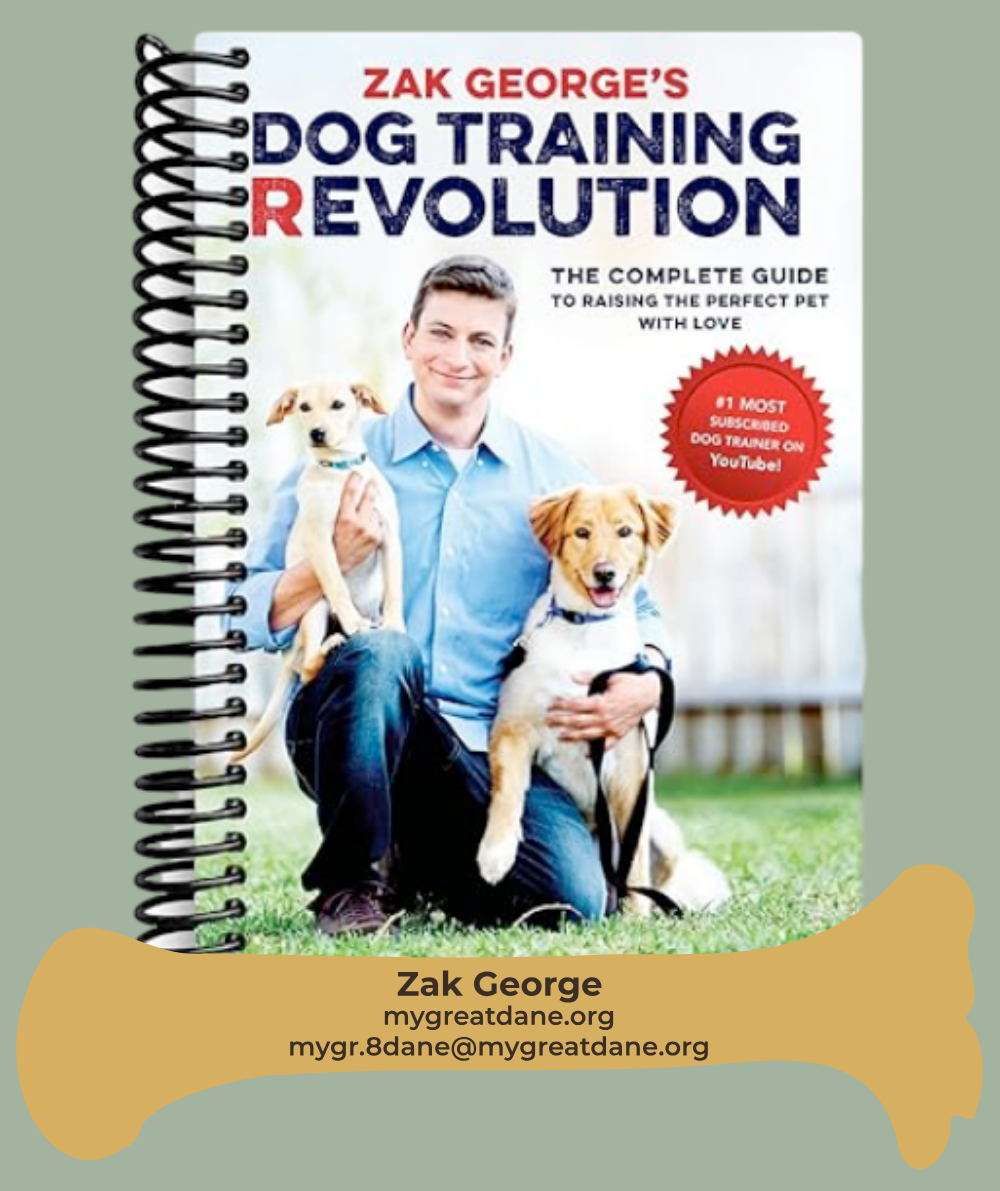
Recommended Trainer: Zak George
One dog trainer I have learned a great deal from over the years is Zak George. His YouTube channel and training resources do an excellent job demonstrating practical, positive dog training methods that owners can apply in everyday situations.
If you are currently working on leash training or basic puppy manners, I strongly recommend checking out one of his books or video courses. Zak also has a popular YouTube series where he adopts a puppy and documents the real-life training journey from day one, which many new owners find extremely helpful.
Of course, Zak is a brilliant dog trainer and he makes it look so easy in his videos, but just spending 20 min a day goes a long ways. Especially, if you have a Great Dane. I am sure there are many other breeds out there with great personalities, but I can’t say enough about Great Danes.
Most importantly, remember that consistent time spent working with your dog is what truly builds results. Even just 20 minutes a day of focused training can strengthen your bond and lead to noticeable improvements in your dog’s behavior and confidence.
Find On Amazon →Affiliate link: I may earn a small commission at no extra cost to you. If this guide helped you, using my links helps support MyGreatDane.org.
Step Four: Consistency is a must
Everyone that walks your pup must be on the same page. We want everyone teaching the same way.
- Make sure everyone who walks your dog does it the same.
- Everyone needs the same commands.
- Also, make sure everyone praises when desired.
- No one yells or jerks the leash.
- Don’t forget the doggy bag!
Remember, there’s no such thing as too much praise when a puppy or an adult dog succeeds.
Leash Training
- Always first out the door, let your puppy/adult know you are the Alpha.
- Start with the “sit” command, make sure your puppy/adult know how to sit.
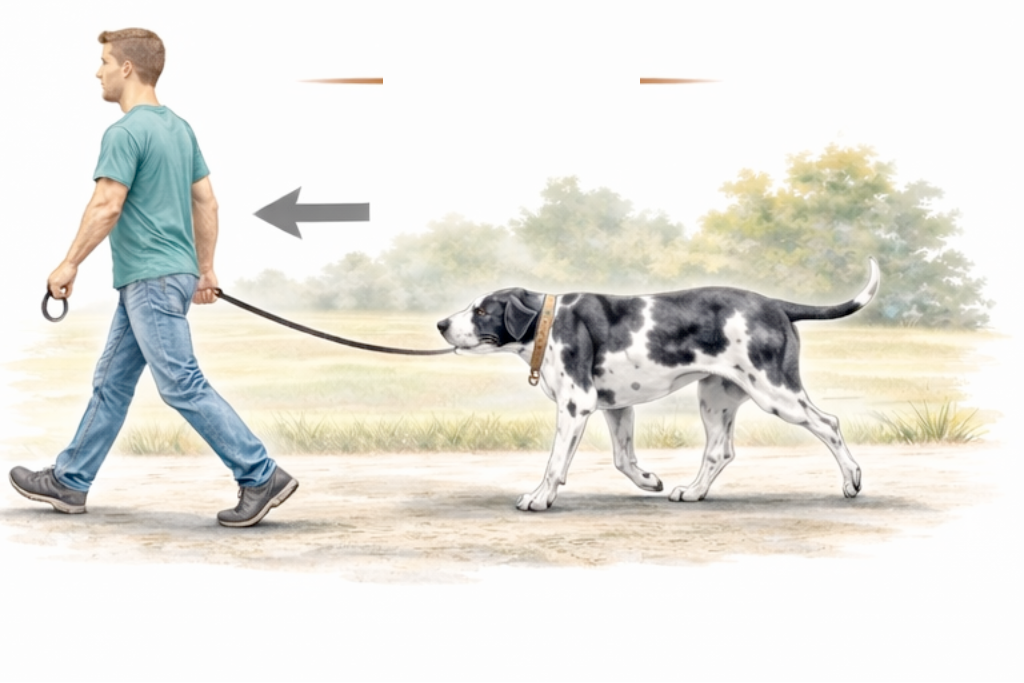
- Begin walking and once your puppy/adult pulls ahead say “no” and turn and walk back the way you came. Do not Jerk or Pull the leash.
- Once you turn your dog will follow.
- As soon as he gets ahead and pulling, repeat the “no” command and turn and walk the other direction.
- Keep repeating this over and over, for some dogs it might take awhile.
The important thing to remember is consistency and to remain calm.Do not jerk your dog or pull them. Simply turn and go the opposite direction. Even if you are walking to the car or done playing some where don’t let your dog pull you along. This is just the beginning.
Leash Training Step 1: Out the Door
First and foremost, when beginning leash training, never allow your puppy or adult dog to rush out the door ahead of you. Establishing calm leadership from the very start is essential for successful leash training. By exiting first, you set the tone and reinforce your role as the guide your dog should follow.
At this stage, it is also helpful to reinforce basic obedience commands such as sit and no if your dog is already familiar with them. Consistency is the key to effective dog training. Just as important, always use a calm, reassuring voice. Remember, dogs do not understand our language the way humans do. However, they are extremely sensitive to tone and volume. Raised voices and frustration create fear, while calm guidance builds trust and confidence.
Before stepping outside, have your dog sit and pause for a moment. This allows them to observe the outdoor environment without becoming overstimulated. In addition, require your dog to remain seated until you give a clear release cue or physical signal to move. This step quietly reinforces the stay command while building impulse control.
Once you begin walking, maintain your leadership position. If your dog starts to pull ahead on the leash, calmly say “no” in that same reassuring tone. Then immediately turn and walk in the opposite direction. Importantly, do not yank or pull the leash when you change direction. Simply turn and move.
The goal of this leash training exercise is to encourage your dog to pay attention and choose to follow your lead. For best results, turn back toward your original starting point so your dog clearly understands the correction. This simple but powerful technique teaches focus, respect for leash boundaries, and proper walking behavior.

Leash Training Step 2: Changing Directions
To recap leash training step one, you have successfully exited the door and begun walking. At some point, your eager companion will likely surge ahead. When this happens, calmly stop, say “no” in your reassuring voice, and immediately turn back toward your starting point. This simple change-of-direction technique is one of the most effective leash training methods for teaching focus and respect.
As your dog returns to the proper walking position beside you, use a consistent marker phrase such as “right here”. If you already have your own preferred command, feel free to use it. The exact words matter less than your consistency and tone. Once your dog’s head is aligned near your waist, calmly praise them with “right here,” “good boy,” or “good girl.”
In the early stages of dog leash training, these correct-position moments may be brief. That is completely normal. Your dog is learning a new walking habit, not trying to sabotage your afternoon stroll. Over time, however, you do want to consistently acknowledge when your dog is in the proper heel position so they clearly understand what earns praise.
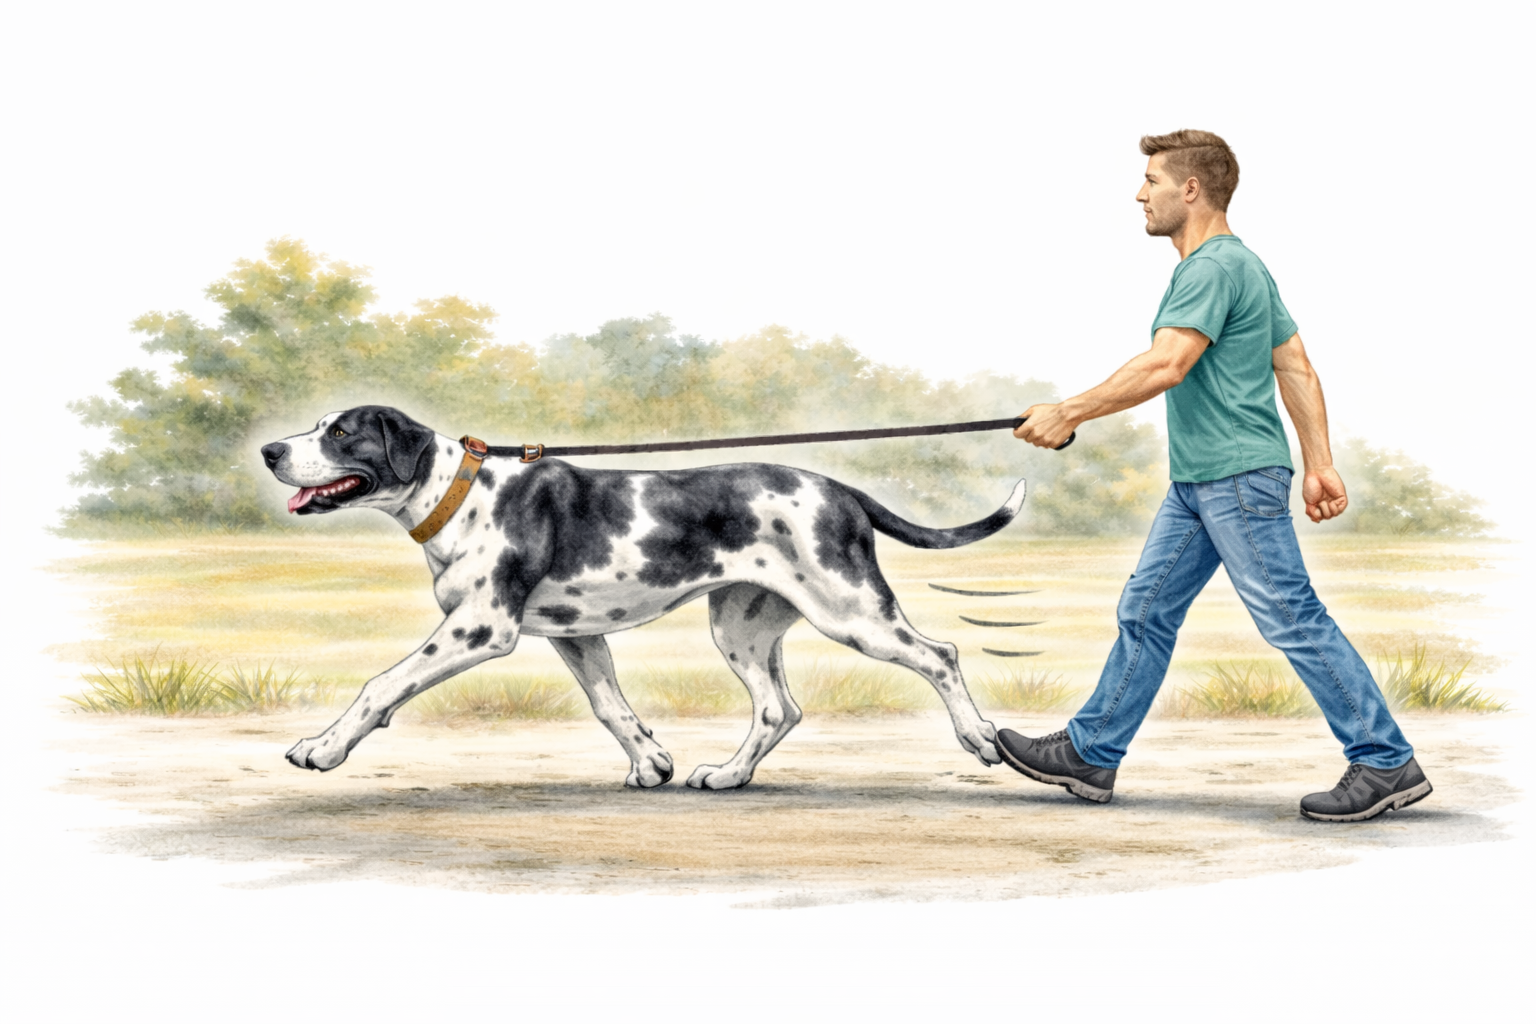
Ideally, your dog’s front legs should not move ahead of your front legs. The goal is a relaxed, loose-leash walk where your puppy or adult dog matches your pace instead of dragging you down the sidewalk like a sled dog in training. A tight leash usually signals that your dog is too far ahead and needs gentle redirection.
Most importantly, be patient and stay consistent. Loose-leash walking does take time to fully develop. In many cases, noticeable improvement comes within a few weeks, especially if you are walking your dog regularly and reinforcing good leash manners every time you head out.
Leash Training Step 3: Building Focus and Consistency
To recap, you began your leash training journey by exiting calmly, your pup moved ahead, and you corrected the behavior by turning and walking the opposite direction. Now your dog is briefly following your lead, which is exactly the progress we want to see. However, this stage is where consistency and communication become especially important.
As you continue walking, make a habit of calmly talking to your dog. Dogs quickly become familiar with their owner’s voice, and hearing you regularly helps keep their attention anchored to you instead of every moving object in the neighborhood. Because Great Danes and other large breeds can become easily distracted outdoors, your steady, reassuring voice becomes a powerful training tool.
At the same time, always stay alert for common distractions such as cats, other dogs, squirrels, or sudden noises. When your dog begins to lock onto something inappropriate, calmly use your correction phrase. For example, I often say “that’s not for you” in a calm but clear tone. Remember, your dog is already excited just to be outside, so your job is to provide calm guidance, not more stimulation.
When your pup inevitably passes you again, simply repeat the process: say “no” and turn to walk the other direction. Especially in the early stages of leash training, you may only make it a few houses down the street before turning multiple times. Yes, your neighbors may wonder what on earth you are doing. Stay the course. This repetition is extremely important because your dog is learning a simple rule: if they do not follow your lead, the walk does not continue forward.
To keep your dog mentally engaged, continue talking to them and occasionally mix in obedience commands such as sit. This helps break up the routine and reinforces that walks are structured training time, not just free-for-all excitement.
Leash Training Step 4: Introducing Treat Rewards
To recap, you and your best friend (BF) have begun your structured walk. As expected, your dog may still surge ahead from time to time. When that happens, you calmly turn and walk the opposite direction, and your pup begins following again. However, at this stage of leash training, we can introduce a powerful motivator: high-value treats.
Pup-peroni Sticks
Effective dog training almost always improves when positive rewards are added. Therefore, now is the perfect time to begin reinforcing proper loose-leash walking with treats. Personally, I like to use Pup-Peroni sticks because they have a strong smell that quickly grabs a dog’s attention. I simply break the sticks into small, bite-sized pieces and carry them in my training pouch along with my dog bags and clicker.
As your leash training walks start getting longer, you can begin what I call “dangling the carrot.” In other words, take three to four small treat pieces and hold your hand naturally at your side. When your dog walks calmly beside you in the “right here” position, immediately praise them and deliver one treat.
Harley
At first, many dogs (and yes, even well-trained Great Danes like Harley) will become extremely focused on your treat hand. That is perfectly fine in the beginning stages. Continue rewarding one treat at a time rather than giving them all at once. This method extends the amount of time your dog remains in the correct heel position and reinforces the behavior you want.
Over time, your dog will learn to keep their head aligned near your waist, which naturally keeps their feet from moving ahead of yours. Eventually, you will run out of treats during the walk, and your dog may begin to drift forward again. However, this is where your earlier work pays off. When you calmly say “right here,” most dogs will begin slowing down and returning to position.
How Long Do We Train
For best results, aim for about 20 minutes per session, three to four times per week, or more if your schedule allows. With consistent practice, most dogs begin showing noticeable improvement within just a few days. Before long, your pup will walk farther and farther beside you without needing frequent stops or direction changes.
Once you reach the stage where you are consistently incorporating treats into your leash training routine, you will notice your walks becoming longer, calmer, and far more productive. With continued consistency, your dog will quickly understand exactly where they are supposed to be during your walks.
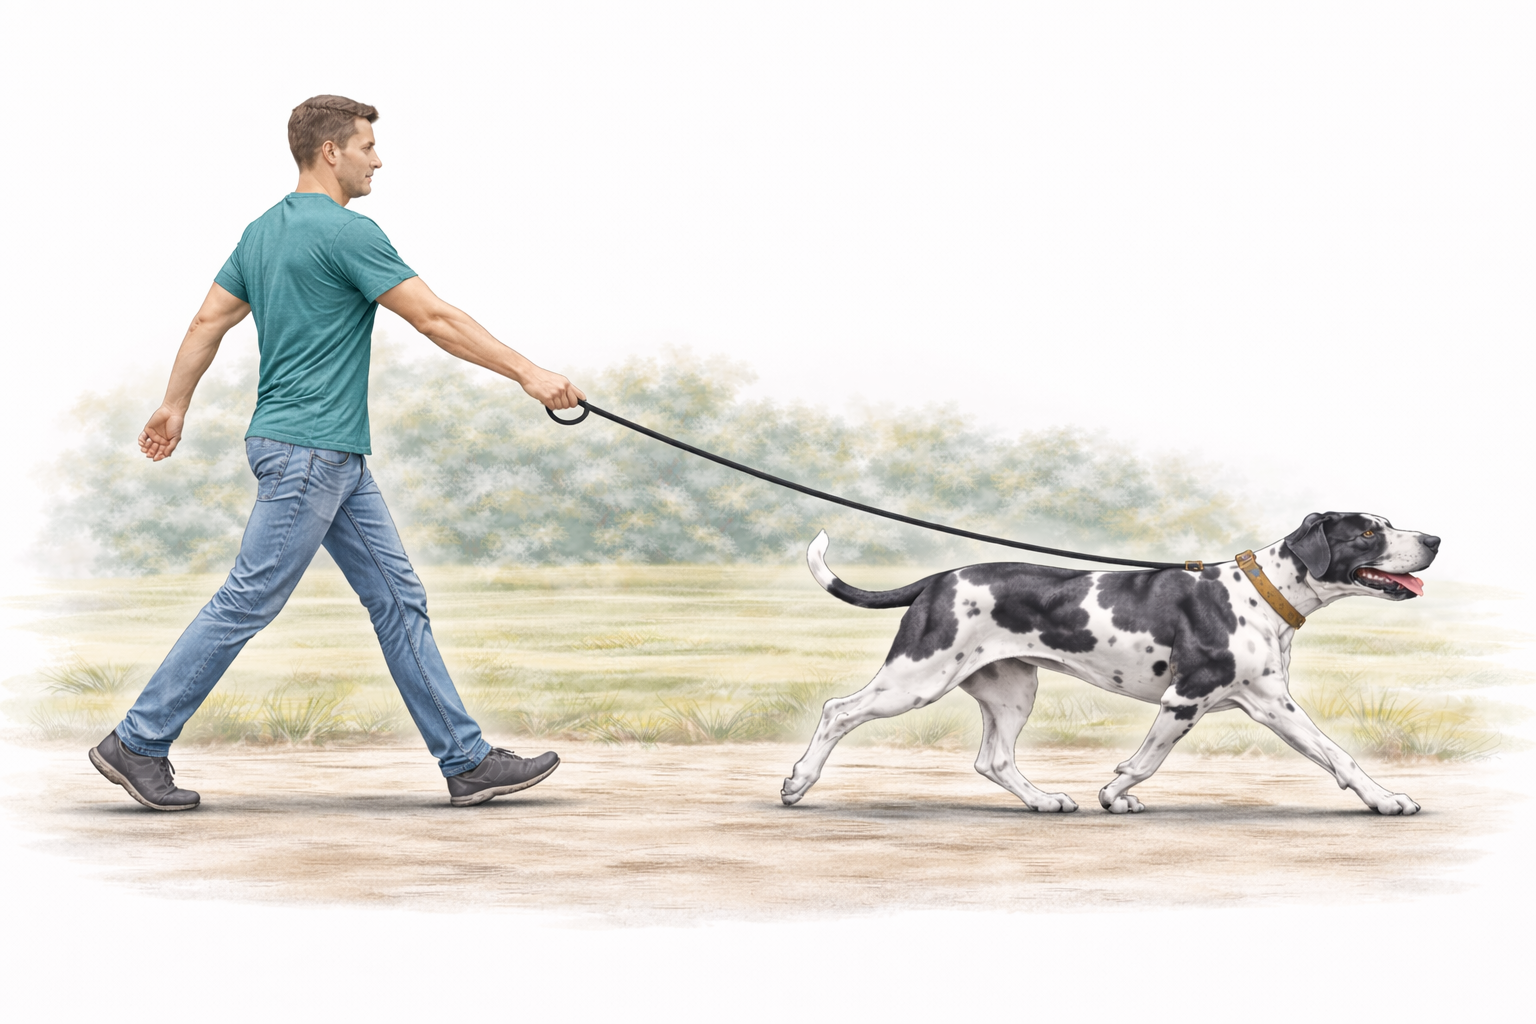
Final Leash Training Notes
Final Leash Training Notes: Stay Calm and Stay Consistent
Above all, successful Great Dane leash training comes down to two simple principles: stay calm and stay consistent. In the ongoing battle between walking your dog and being walked by your dog, consistency almost always wins. Your tone, your timing, and your patience matter far more than physical strength.
Buster
I was reminded of this years ago when my parents were caring for a rescue Great Dane named Buster. He was extremely fearful and had very little leash experience. One afternoon at the soccer fields, as I was approaching with Hope (RIP), Buster became startled and tried to bolt. My dad instinctively pulled back on the leash while Buster pulled the opposite direction. Unfortunately, the hardware failed, and suddenly there was a 162-pound harlequin Great Dane joyfully sprinting through youth soccer practice.
While Buster was having the time of his life, my parents were understandably mortified. It took nearly 20 minutes to regain control. And yes, in true Great Dane fashion, Buster even stopped mid-adventure to leave an unforgettable “souvenir” on one of the practice fields. Funny in hindsight… less funny in the moment.
However, the lesson was clear. Instead of pulling against Buster, the better approach would have been to briefly move with him, then calmly turn and guide him the direction we wanted to go. During loose-leash training, your dog will not always immediately follow your lead. Sometimes you must give a few steps, then redirect. This is not losing. This is smart handling.
At times, leash training can feel like a battle of wills. That is completely normal, especially with powerful breeds like Great Danes. Nevertheless, staying calm is absolutely critical. If you become angry, loud, or frustrated, your dog will become more anxious and far less responsive. Calm leadership builds trust. Tension builds resistance.
Zoey
Once your dog is reliably walking on leash in quiet areas, begin gradually introducing busier environments. For example, Zoey used to be very nervous around crowds. To build her confidence, I regularly walked her near soccer practices and games. Whenever she stiffened or started to pull, we simply turned, walked a few steps away, and then calmly redirected back toward the crowd while I continued speaking to her in a reassuring voice.
Max
The same principle applies in many everyday situations. Max, my mom’s 200-pound Great Dane, occasionally decides he does not want to enter the vet’s office. Instead of forcing the issue, we calmly walk a few steps away, reset, and try again. Often by the third or fourth gentle redirect, he willingly moves forward. This is how effective dog leash training works in the real world.
Ultimately, once you understand the fundamentals of leash training, you will begin to see how these calm redirection techniques apply to many different situations in your dog’s life. That is exactly why it is so important to introduce the leash early in puppyhood. The sooner your dog learns to follow your calm, confident guidance, the smoother your walks — and your daily life together — will become.
Try for Four Training Sessions a Week
More Great Dane Training Reads
Calming Routines That Actually Work
Simple structure, white noise, and enrichment that helps sensitive Danes settle.
Read article →
Puppy Exercise (Joint-Safe)
How to burn energy without damaging growing joints.
Read guide →
Traction Zones to Prevent Slips
Home setup changes that reduce fear, falls, and injuries.
Read more →